The Tools for Controlling Exposure and Their Effects
Images from https://www.pexels.com/ are used as examples as I discuss these basic principles of exposure.

Aperture
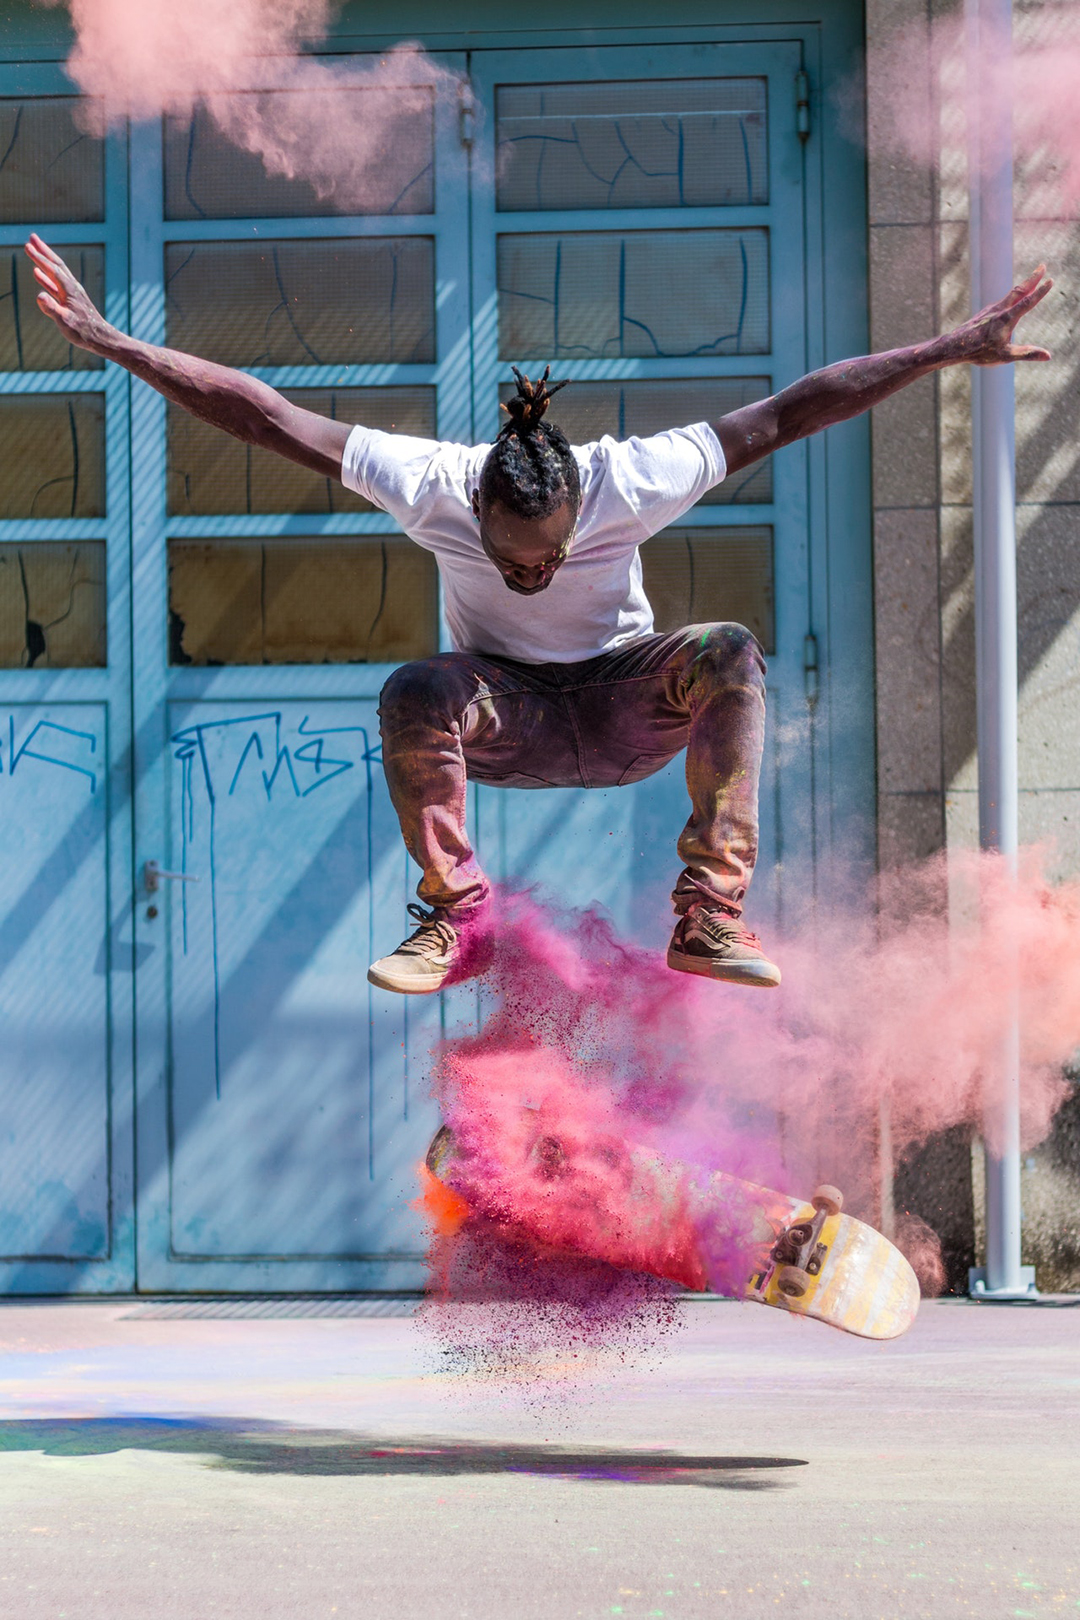
This photo above was taken with an aperture of 2.2. This means that light passed through an opening of 1/2.2 of the width of the lens on its way to the light sensor. Aperture openings this wide are usually only found on prime lenses which have a fixed focal length (adjustable focal length is the ability to zoom in and out). A wide aperture like this will let a lot of light in, and create a very shallow depth of field. This is why the objects on the table are in sharp focus, and everything beyond it is soft and blurry.
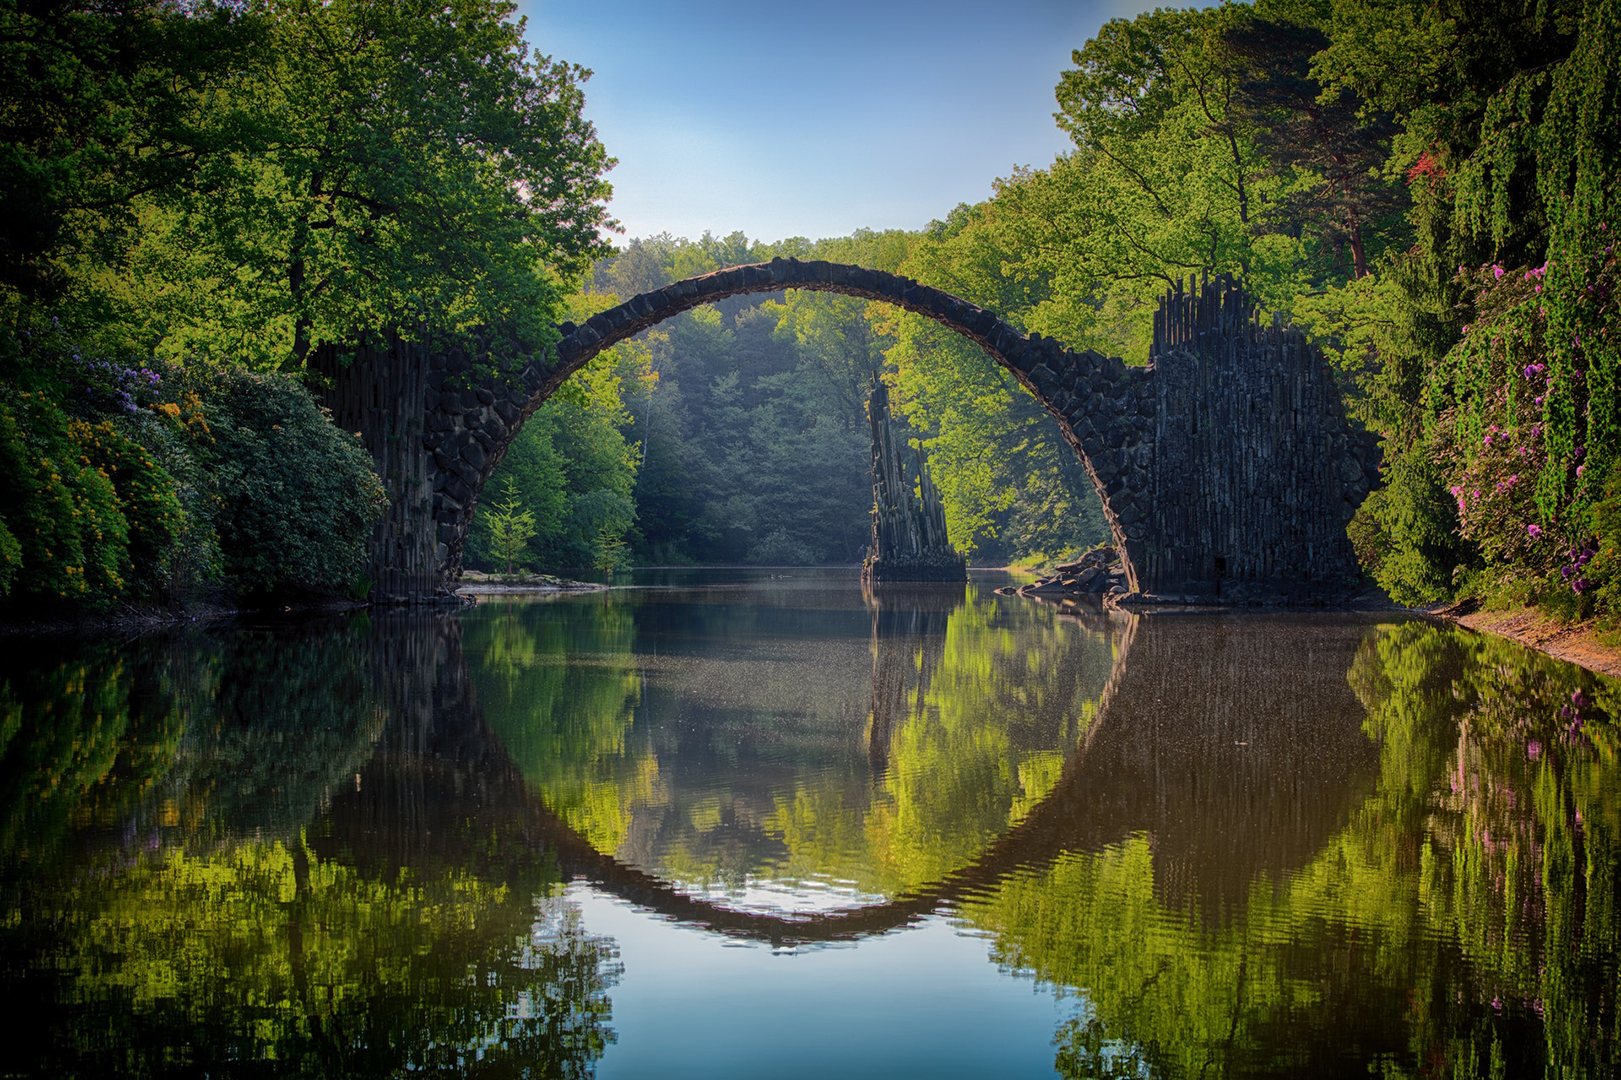
This photo was taken with an aperture of 8. This is a much smaller opening which means less light is hitting the camera’s sensor. The effect of this is a deep depth of field. This was a good choice for this photo because most of the beautiful landscape is in sharp focus while still putting emphasis on the arch as a focal point. Most lenses will reach apertures of at least f/16 or f/22.
Shutter Speed
This photo was taken with a shutter speed of 1/8000 of a second. The shutter speed is the length of time that light is allowed to hit the sensor in the camera. This very brief moment of time provides an image that freezes motion in space. Motion blur rarely exists within this realm. Because there is not much time for light to hit the sensor, brighter light or wider apertures are needed to avoid making an underexposed image.
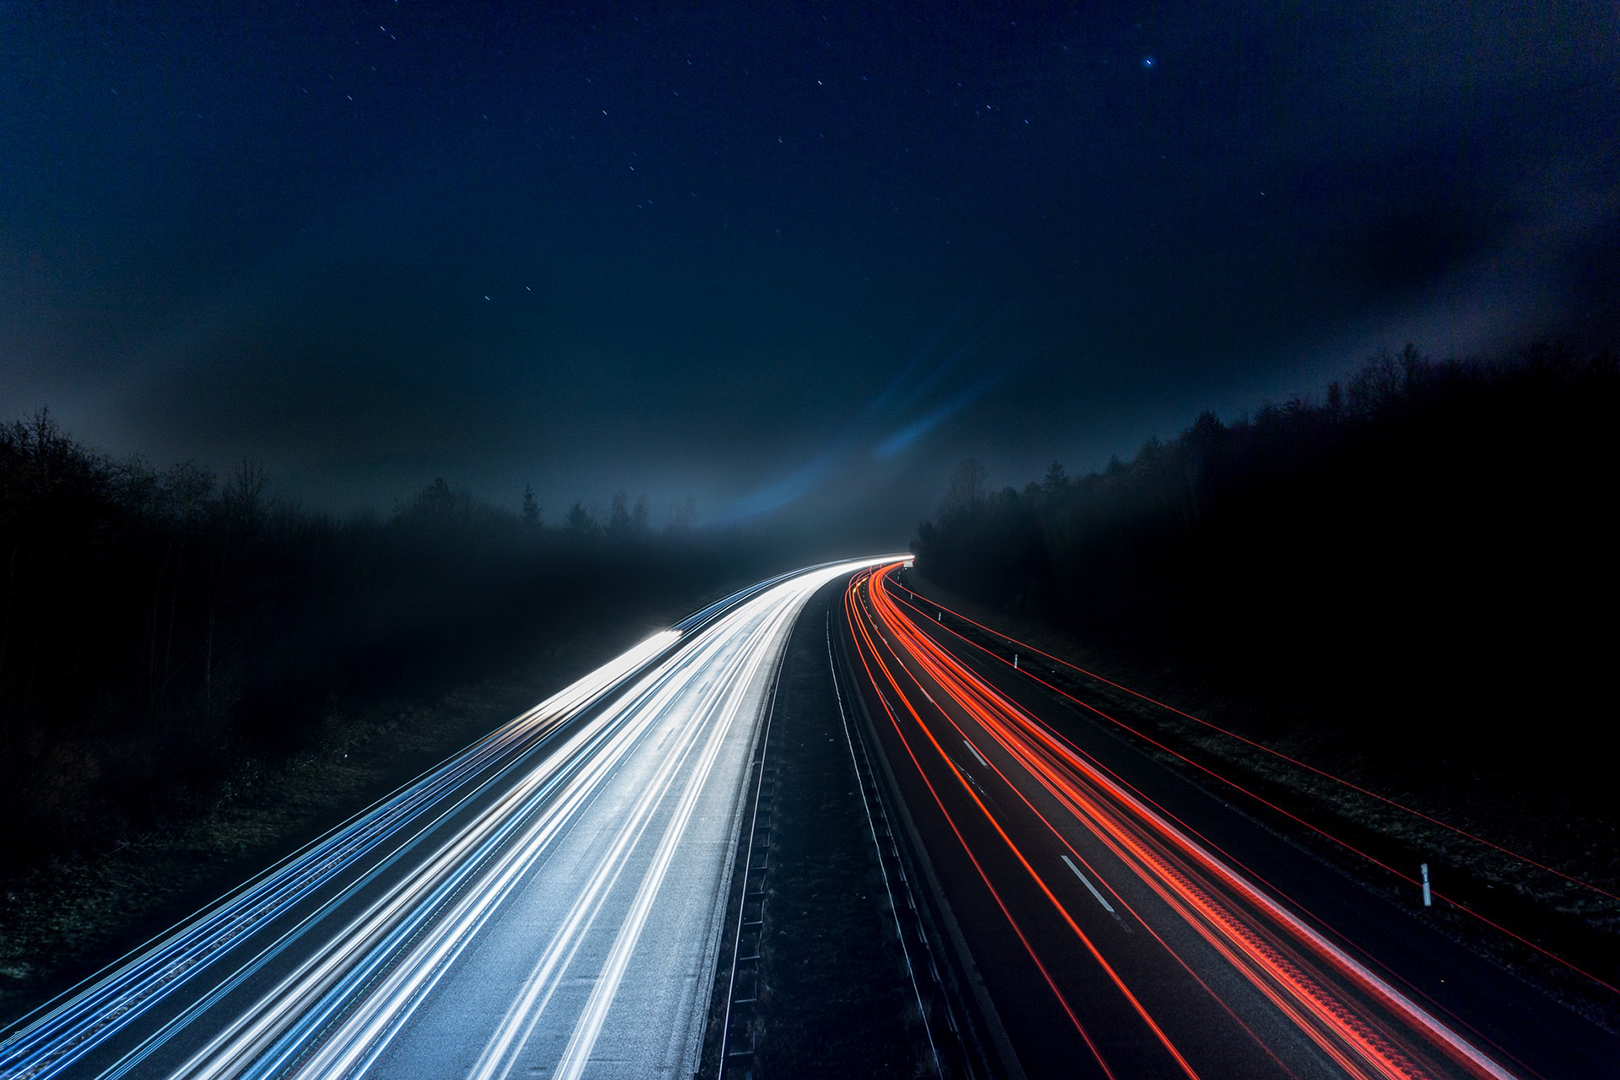
This photo was taken with a shutter speed of 53 seconds. The camera has to be kept very still on a tripod or solid surface for long exposures like this one. Slow shutter speeds can be used to capture very dark scenes and blurred motion. In this image, car head-lights and tail-lights are blurred streaks along the road. The clouds are soft and whispy as they gently floated during the shot. Motion can even be seen in the stars as the earth was rotating. Many cameras only have shutter speeds as long as 30 seconds. To achieve times longer then this an intervalometer is needed. An intervalometer can keep the shutter open for as long as your battery stays alive.
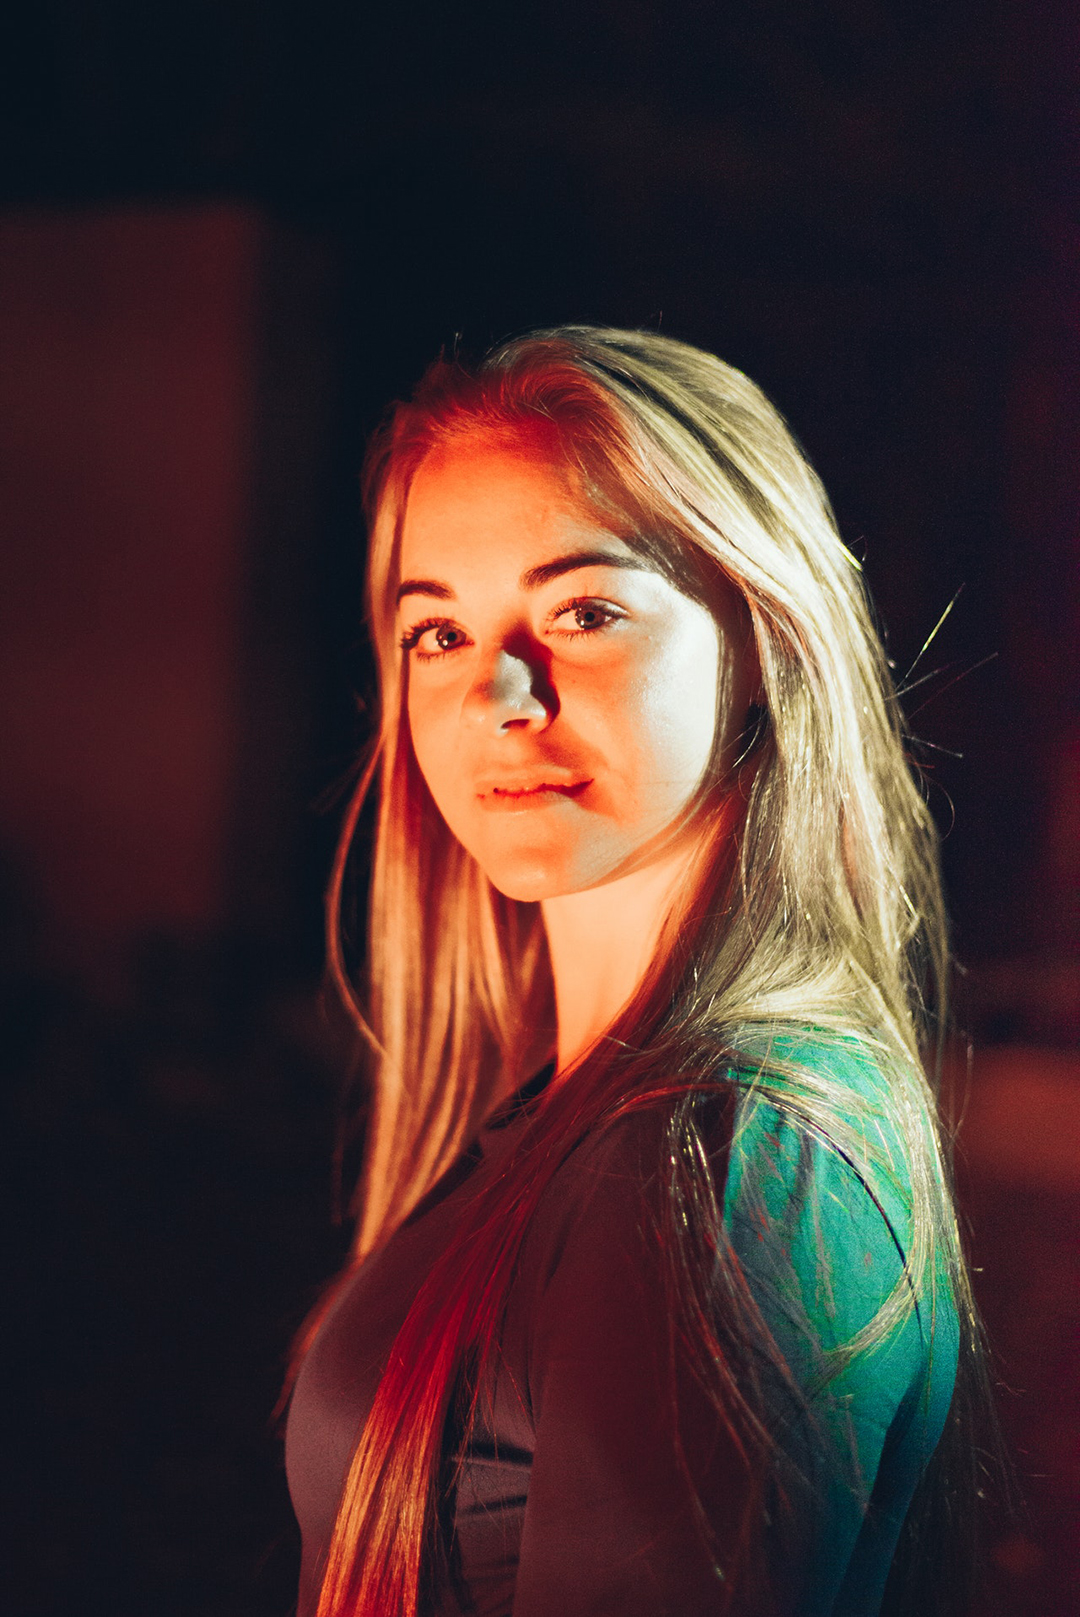
Low light can give a great mood to your photos, but also creates a difficult obstacle. This photo was likely taken late at night and outdoors. Finding artificial lights bright enough to illuminate your subject is a challenge if you don’t have your own flashes. There are a few things you can do to make sure the light that you can find is enough for a decent exposure. In this case, a wide aperture was used, but a slow shutter speed could get unwanted motion blur. So, ISO can help us get a bright enough image. The ISO is the camera sensor’s sensitivity to light. This setting can be raised for a more exposed shot. Be careful not to get carried away though. Higher ISO settings come with a cost of noise and grain.

The photos you chose and your explanations did a really good job at explaining aperture, shutter speed, and ISO! You could definitely use this blog post to teach others wanting to get into photography.
– Jenna Schwarz (https://jennaschwarz.wordpress.com/)
Also check out Sam Vanderwalker’s blog (https://samanthavanderwalkerphotography.wordpress.com/digital-imaging/)
LikeLike
I really liked the photos you picked and I loved your night photo style, I think that would be really cool to learn and I hadn’t even considered doing so. What I really like is not only are these great photos to illustrate each style but they are just really artistic and well done as well.
Westley has a super cool blog too, you should check it out: https://westleymata.wordpress.com
LikeLike
Wilson,
I think that you explained the aperture and shutter speed very well. I love that you provided specific numbers in your blog so that the reader could understand how each photo was taken. You broke down the process in an easy way to understand. I love low-light photography, but haven’t had the chance to try it yet. Maybe I will this semester. Great job!
Here’s a link to my blog: https://haleyprestwich.home.blog/2019/04/30/haley-prestwich-self-motivated-education/
Also Check out Justin Schone’s: https://justinschoneblog.wordpress.com/2019/04/29/wide-and-narrow-aperture-slow-and-fast-shutter-speed/
LikeLike
Wilson,
I really love the photos you chose for this post! Your explanations of aperture, shutter speed, and ISO were great! It was very easy to read and understand.
I’m impressed!
-Christie Bryant http://www.cleverchristie.com
Here’s a line to Haley’s blog: https://haleyprestwich.home.blog/2019/04/30/haley-prestwich-self-motivated-education/
LikeLiked by 1 person